|
Article ID: 1250
Last updated: 27 Apr, 2020
You can save time when importing Trial Balances into Accounts Production by exporting a CSV (comma-separated values) file from your bookkeeping software. This is quicker than manually entering the data. Below is a short video that will take you through the import routine. Alternatively, for a step by step guide, please see the instructions underneath the video. Step 1: Exporting or Creating a CSV file to importFrom your bookkeeping software, Export a CSV file (spreadsheet) to include:
Example Trial Balance with separate debit and credit columns
Example Trial Balance with one column
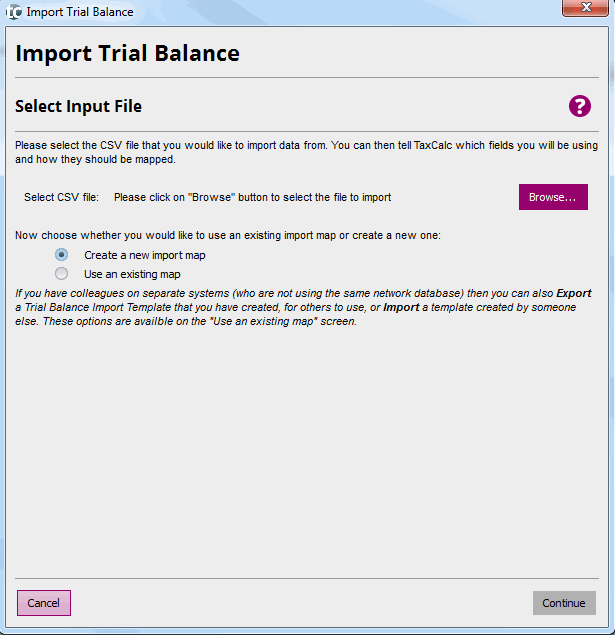
Headings in the first row are optional and the columns can be in any order. Step 2: Start the import procedureLaunch Accounts Production. Open your client and the accounting period. Select Posting from the left-hand menu. Select Import Trial Balance from the left-hand menu. Step 3: Create the import mapThe first time you use the wizard, it will display a welcome screen. Click on Continue to move to the next step. Select Import via CSV file on the select import method screen. Click on Continue. Click on Browse… and select your CSV file. Leave the option set to Create a new import map. Click on Continue.
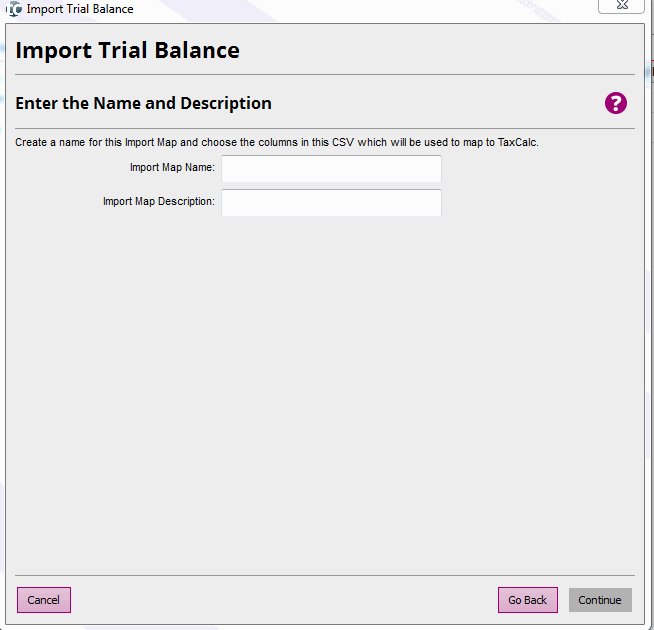
If multiple clients are using the same bookkeeping software, you can reuse an existing import map for other clients. Click here for our video process on How do I use an existing map to import a Trial Balance? Step 4: Name the import mapEnter a name and description for the import map. TaxCalc will use these when applying an existing map to other clients or in future periods. Click on Continue.
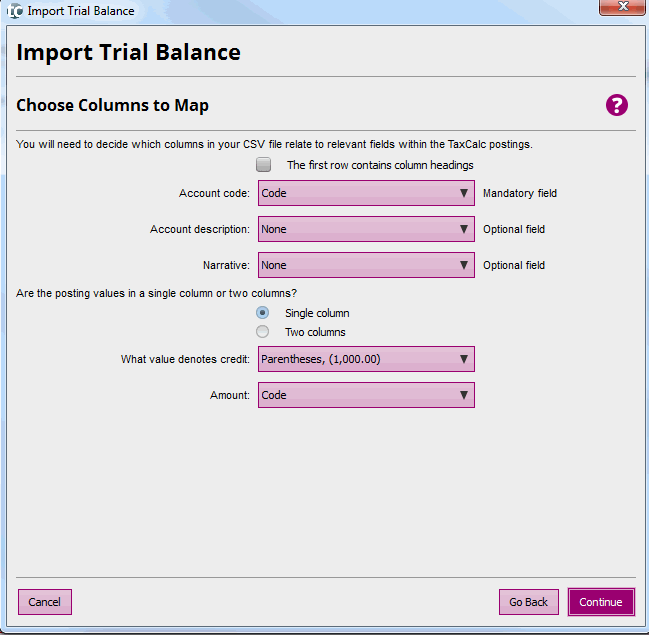
Step 5: Import map settingsComplete the Import Trial Balance screen using the details from your CSV file. If you've used headings in the CSV file, tick The first row contains column headings. Select the correct column for the account code – this is mandatory. This column can be alphanumeric. Select the correct columns for account description and narrative if they appear in the CSV file. Click on Single column if the debits and credits are in one column. Select Parentheses, (1,000.00) or Hyphen, -1,000.00 to show which figures are credits. For Amount, select the column that lists the figures. Click on Two columns if the debits and credits are in separate columns. State which column contains debit values and which contains credit values. Click on Continue.
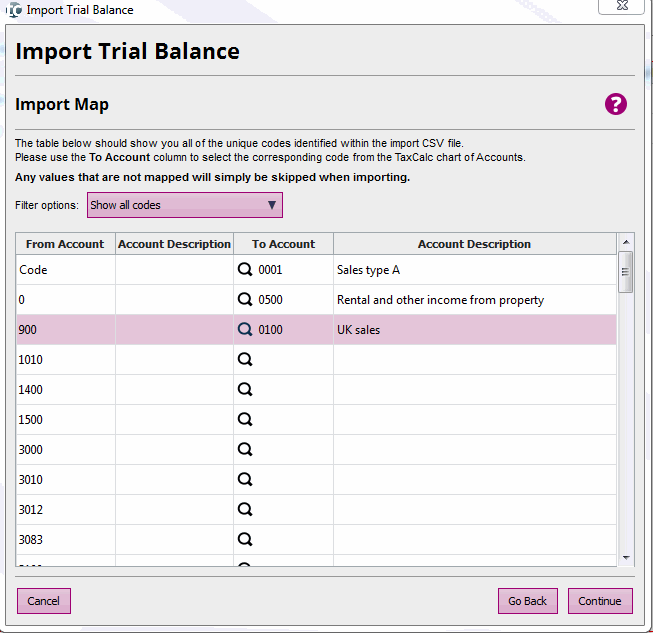
Step 6: Map CSV entries to the account codesClick on the first data row. Headings will only appear if they're in CSV file. Click on the magnifying glass in the To Account column. Select the corresponding TaxCalc nominal code. Repeat this process until you've mapped all the rows. Click on Continue.
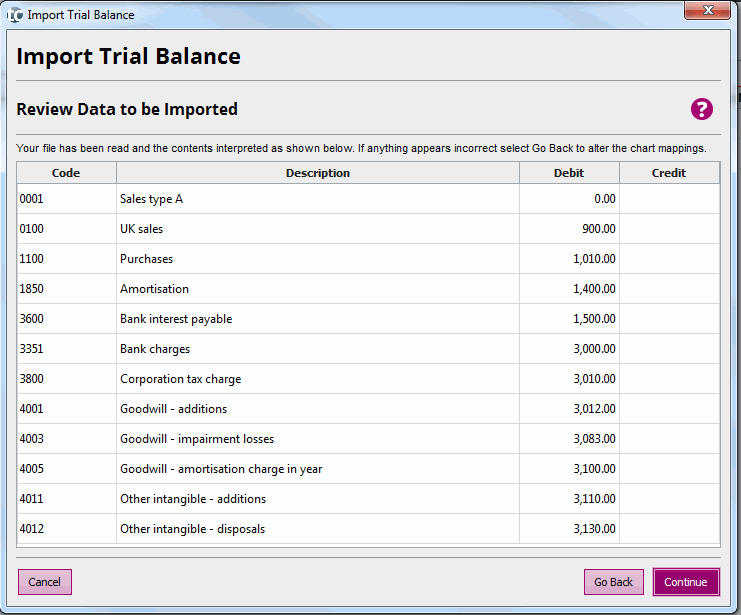
Review the data to be imported.
Click on Continue. Click on Finish to import the Trial Balance. NOTE: If you need to make any adjustments, you'll need to finish the import process and create a new posting batch with the amended figures. However, if the imported figures don't balance, you'll need to create a balancing post.
This article was:
|
|||||||||||||||||||||||||||||||||||
