Automated Message Settings allows you to automate the process of requesting records and sending optional reminder emails for clients which automatically generates a message. These messages can either be sent individually or in bulk.
You can schedule emails to be sent to clients and select to automate an email that you want to send to your clients a certain amount of days after their year end.
Once Communications Centre has been purchased, and if no automations are currently active, the Admin users will receive a notification within the TaxCalc Notifications Panel, where you can select Manage settings to automatically open the Automated Message Settings screen within Admin Centre.
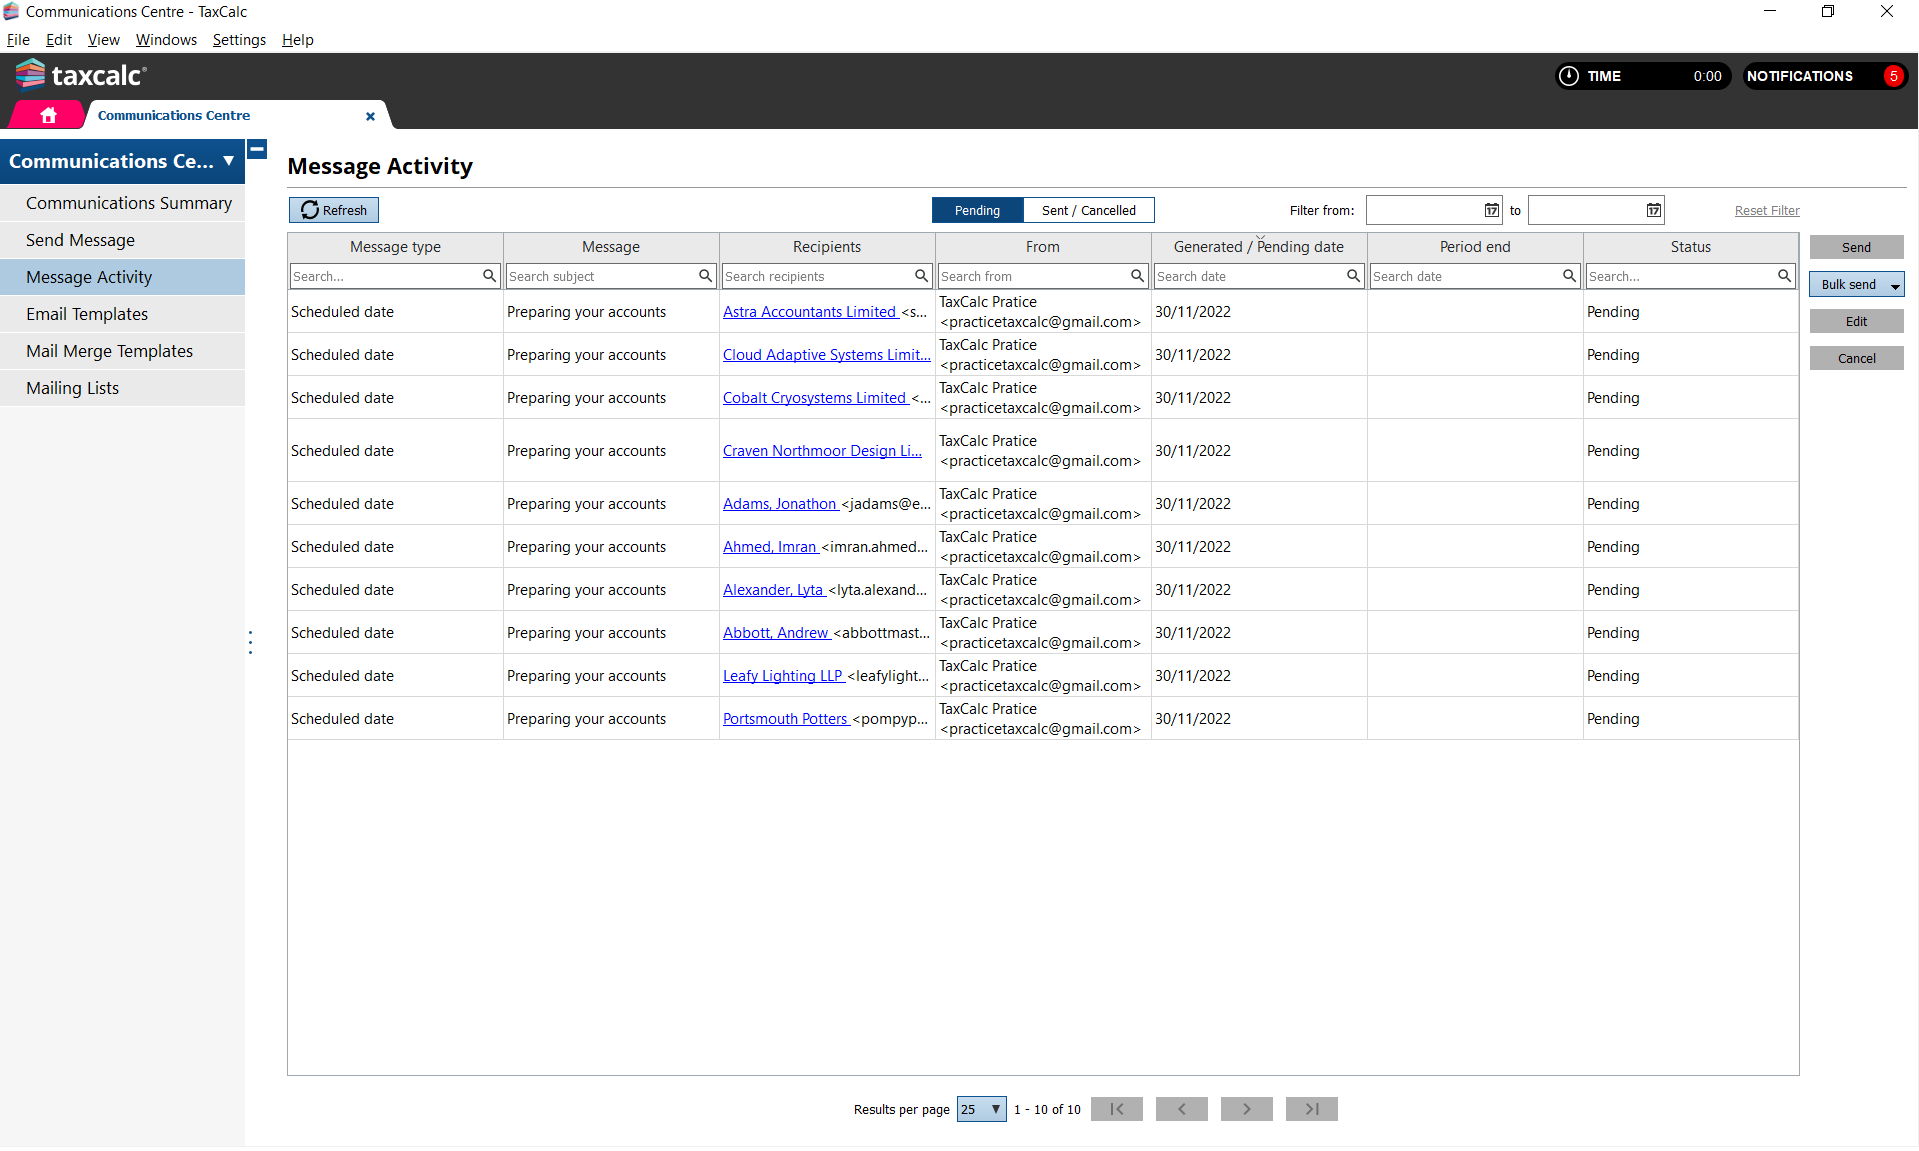
Once automation has been activated, the message will then reside in the Message Activity screen in Communications Centre within the Pending screen where you can view all scheduled emails. You can then choose to send, edit or cancel the scheduled email, depending on your requirements.
-
From Admin Centre select Applications.
-
Select Communications Centre and click Customise Communications Centre.
-
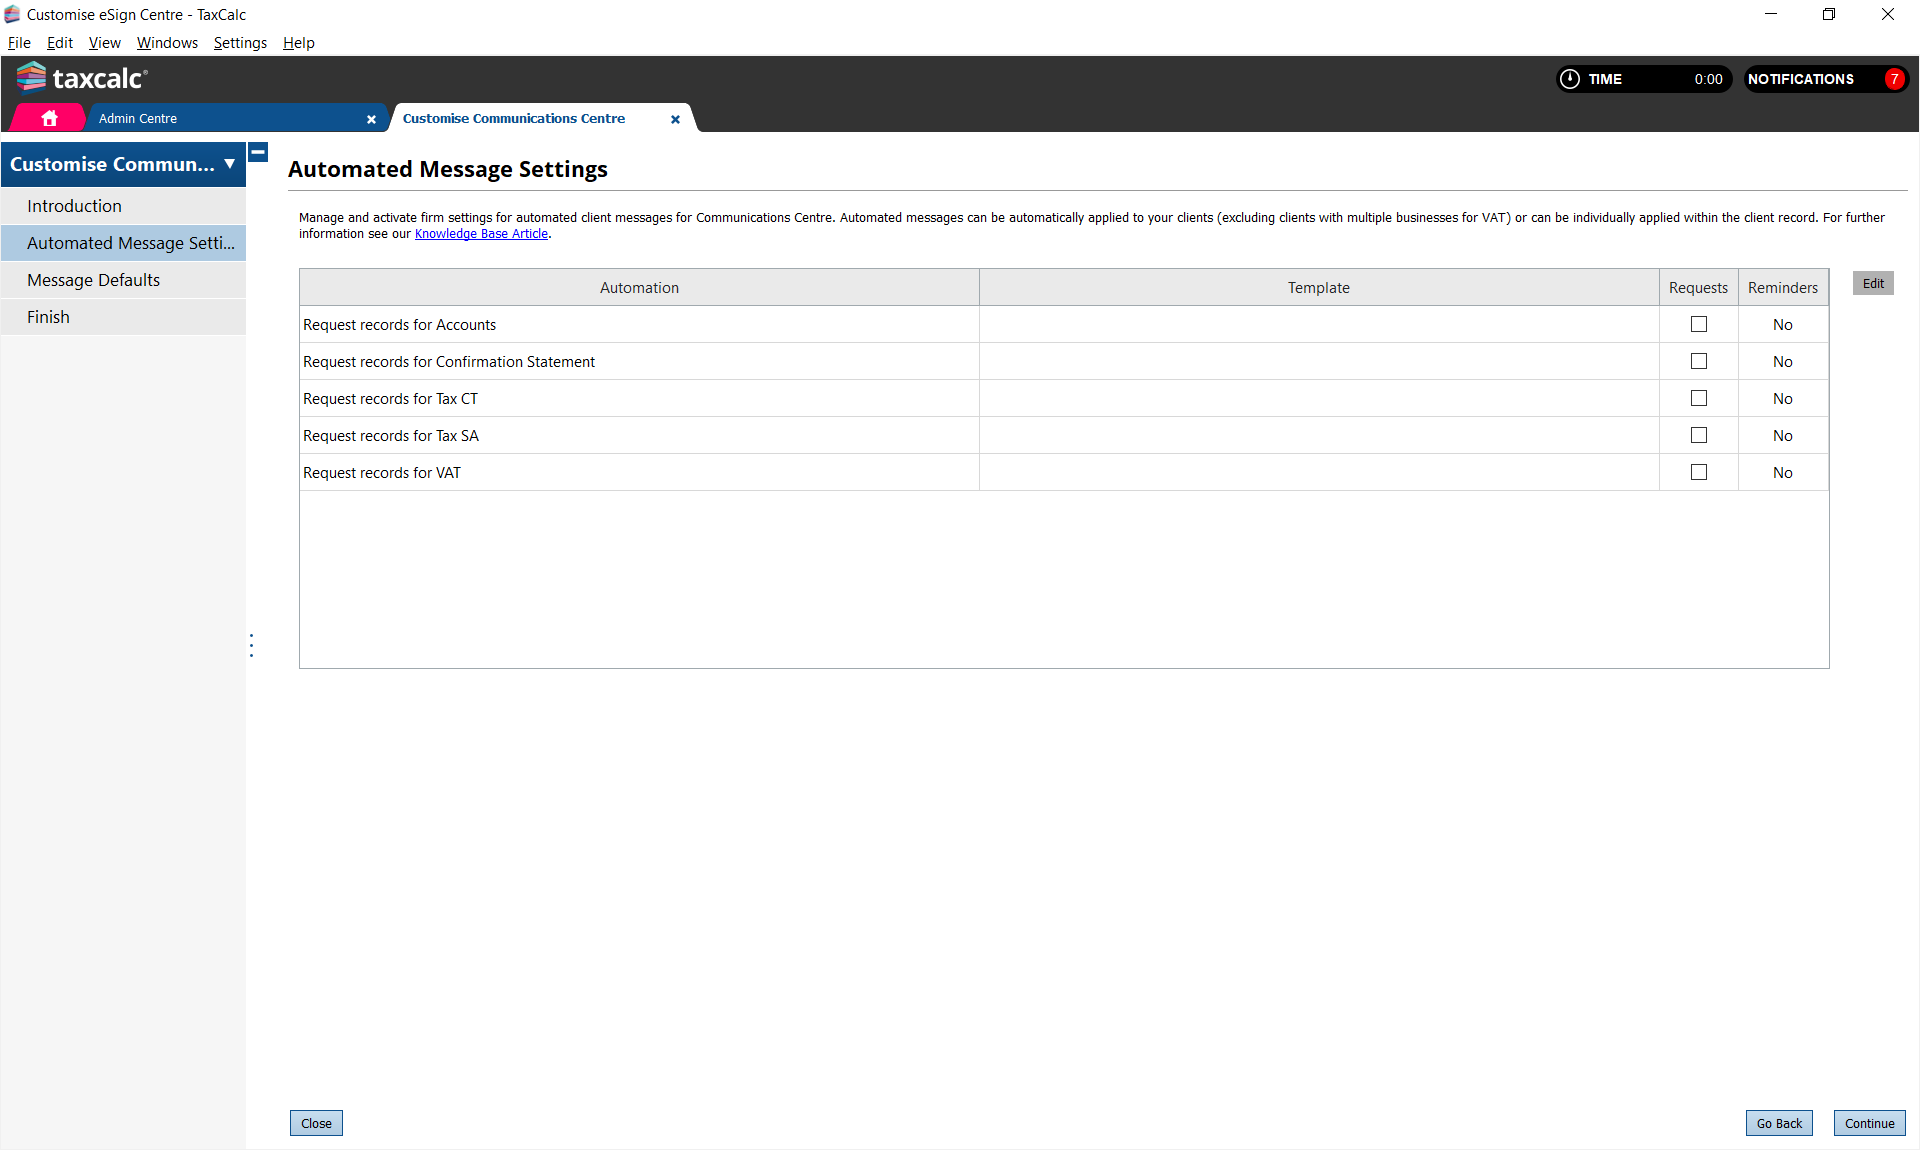
Select Automated Message Settings from the left-hand menu.
-
Select the required message request and optional reminder to activate one of the following:
-
Request records for Accounts.
-
Request records for Confirmation Statement
-
Request records for Tax CT
-
Request records for Tax SA
-
Request records for VAT
The Request records dialog is displayed.
-
Click Request or Reminder.
-
Select Send From and choose the appropriate email account the message is to be sent from.
-
Apply the required Template.
-
Add the appropriate number of days in the Usual Year End Days to ensure the message is generated a certain number of days after the company year end.
-
Select Reminders Active to automatically generate reminder messages.
-
Set the number of Days after the previous message is sent you require the reminder to be generated.
-
Select the reminder email Template.
-
From Bulk Options, select Automatically activate setting for all existing eligible clients within their client record to activate the record request for all relevant clients.
-
However, if you wish to apply the setting to a specific client rather than all eligible clients, you can set this manually by opening the client record in Practice Manager.
-
Click Activate.
-
Once the set number of days passed the year end has lapsed, the request records message is automatically generated and sent to the Pending screen within Communications Centre.
-
If you have selected to generate reminders, once the set number of days after the previous message has been sent has lapsed, the reminder message is automatically generated and sent to the Pending screen within Communications Centre.
-
Users associated with the From email accounts will receive a notification in the Notifications Panel, to advise that there are x number of pending Records Request, Records Request Reminders or scheduled messages.
-
From any one of these notifications, select Review and send to automatically display the appropriate messages within the Message Activity Pending screen.
-
Alternatively, select Dismiss to remove the notification and manually select Communications Centre > Message Activity > Pending where you will see a list of emails you can select and review before sending.
-
Now select to Send, Bulk send, Edit or Cancel the pending message.
Once the email has been sent successfully, the following message is displayed:
For more information on Communications Centre, please see KB3199 Communications Centre: Collateral.