With the release of TaxCalc for the 2016 year, TaxCalc have included some advanced options when installing the network version of the program for the first time. These options include the ability to customise the installation location of the TaxCalc program and the database engine (PostgreSQL) to the customers requirements.
IMPORTANT: TaxCalc cannot support custom installations of PostgreSQL and TaxCalc. Your own IT support will be expected to troubleshoot any issues arising from such an installation.
If support from TaxCalc is required for a custom install or to troubleshoot custom install problems, this will be on a chargeable basis.
There are two main parts to a custom install:
Installing the PostgreSQL database engine
Installing Taxcalc after a manual PostgreSQL installation
Installing the PostgreSQL database engine
The following instructions assume a clean system with no pre-existing Postgres or TaxCalc.
- Make sure you are logged in as an administrator level user on the machine you are using as the server.
- Download the latest version of PostgreSQL from TaxCalc (currently postgresql-9.4.4-3-windows.exe).
- Run the PostgreSQL installer.
- During the installation, you will be asked for the program install (bin) and database (data) path for PostgreSQL. Choose the paths you want it to be installed to (you must choose a folder path that is local to the machine that will be running the database engine, remote/network paths will not function correctly and may lead to data corruption).
IMPORTANT: Can I store the Postgres database on a remote drive or NAS box?
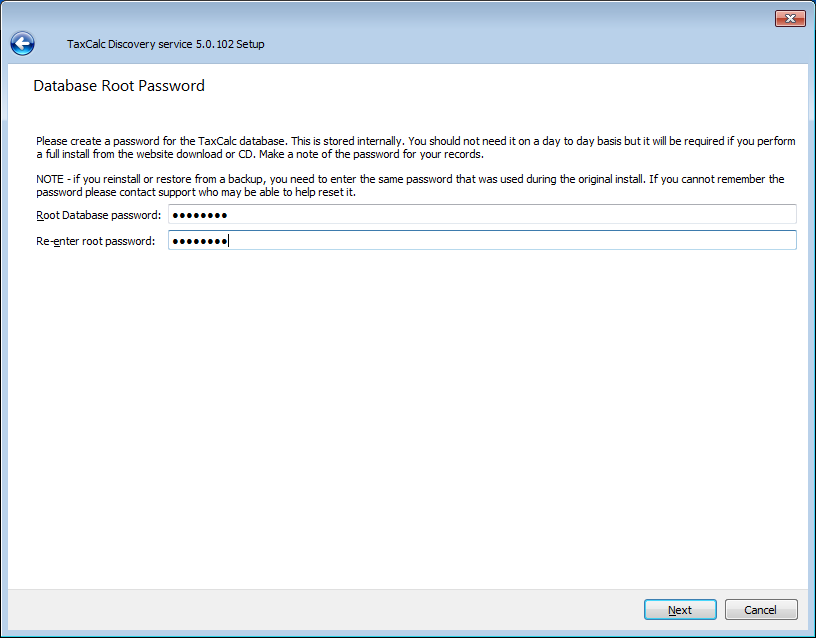
- You will be prompted to create a root database password. You must set a root database password that conforms to your organisation's password complexity rules.
- You must make a note of the following details that will be required when installing TaxCalc itself:
- The PostgreSQL installation path (the bin folder).
- The PGDATA location (the database folder).
- The root database password.
- The port used (default is 5432).
Installing Taxcalc after a manual PostgreSQL installation
- Download the current installer from the website.
- Run the Installer.
- Follow through the installation wizard steps.
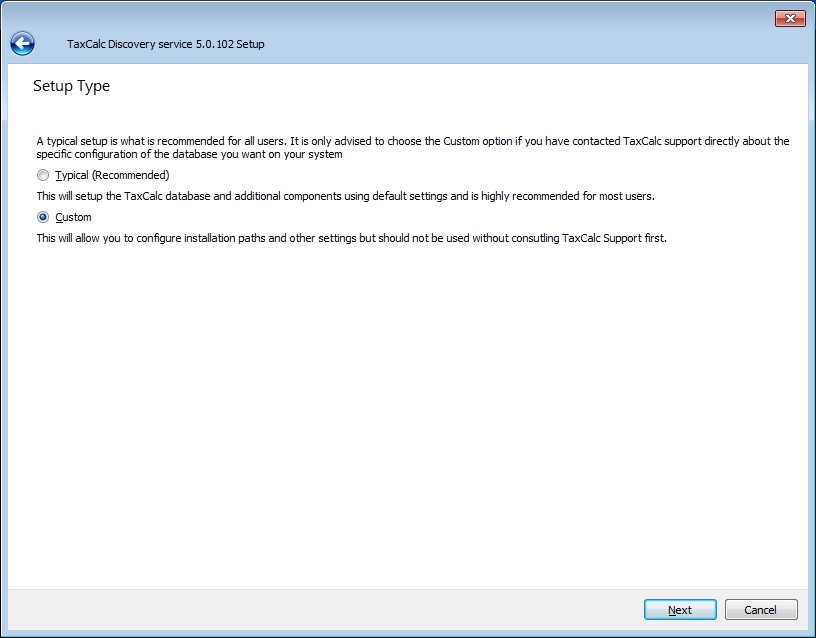
- Select the Custom option when prompted (see below).
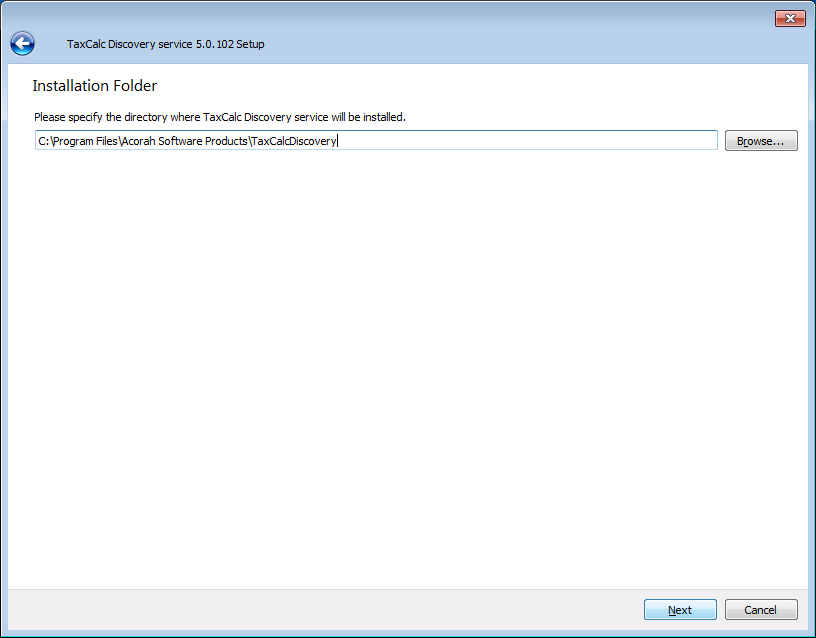
- The next screen will prompt you for the TaxCalcDiscovery service path. It is recommended you leave this at the default which should be your default Program Files or Program Files (x86) directory.
- The next screen will show you the Licence Agreement. You must click I agree to continue with the installation.
- The Advanced Database configuration page is now shown, pre-populated with the default options. These will need changing to the values you set during the PostgreSQL portion of the installation.
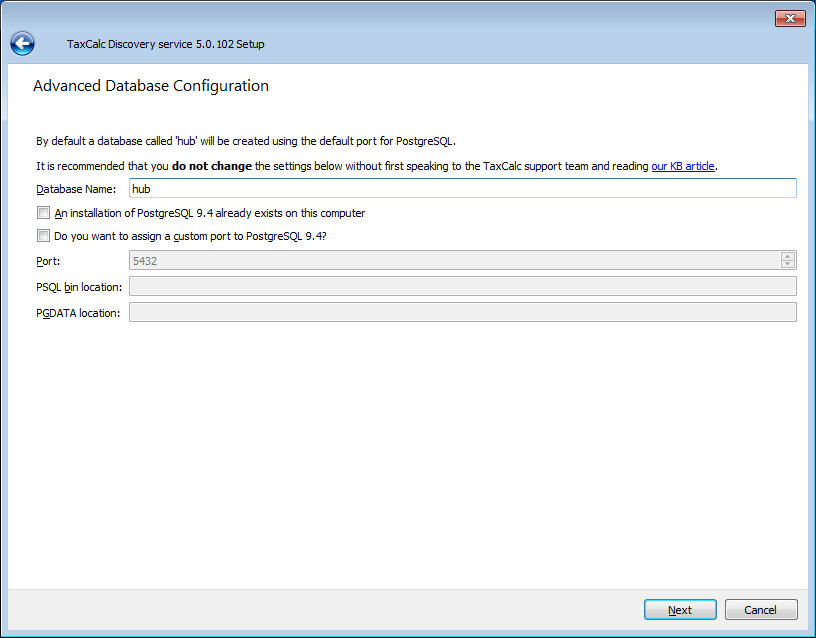
- Enter the Database name. This is the name of the TaxCalc database inside the PostgreSQL database structure. Leave this at the default even if changing the database location.
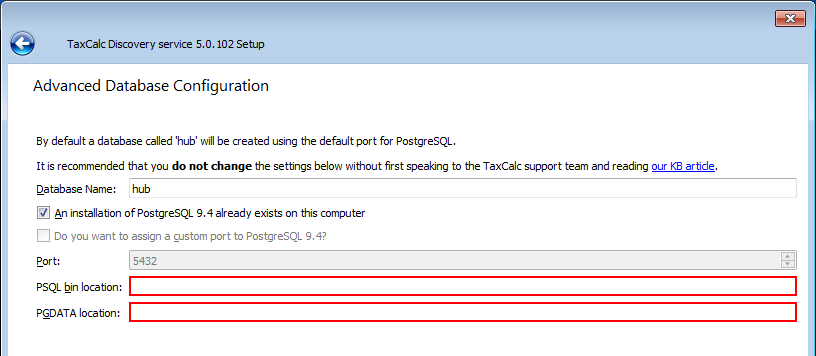
- Select An installation of PostgreSQL 9.4 already exists on this computer. This allows you to add TaxCalc to the installation of PostgreSQL installed in the first step. Enter the current PSQL bin and PGDATA locations you specified when installing PostgreSQL earlier. If you need to select a port other than the default, also change that now.
- After choosing your options, you will be prompted for the root database password.
- The installation will now run. When it is complete it will offer to start TaxCalc for the first time. Allow TaxCalc to run and it will finalise the completion of the database.
- Keep a note of any customisation that you have made as this information will be required by a TaxCalc technician if any problems occur.